Setting up the Yoast SEO Plugin in WordPress is a straightforward process. After installing the plugin from the WordPress dashboard, you can configure the settings to optimize your site’s SEO.
The plugin provides helpful prompts for adding meta titles, descriptions, and keywords to improve your website’s search engine visibility. By following the installation steps and customizing the plugin settings, you can enhance your website’s SEO performance efficiently.
Yoast SEO is a popular tool among website owners and content creators due to its comprehensive features that cater to both technical SEO and content optimization. Its ability to analyze and provide actionable insights on keyword usage,
internal linking, and meta descriptions helps users enhance their website’s overall SEO performance. Additionally, the user-friendly interface of Yoast SEO simplifies the process of optimizing content, making it accessible for users of all skill levels to effectively improve their website’s search engine visibility and ranking.
Yoast SEO Features
Yoast SEO stands out as a leading WordPress SEO plugin, boasting a wide array of tools and functionalities. Here’s a brief summary of some of its standout features:
- Manage the SEO titles and descriptions for each blog post individually.
- Support for SEO titles and descriptions within taxonomies (like categories and tags).
- Preview options for Google search results.
- Efficient keyword analysis.
- Configuration options for meta robots:
- Simple addition of noodp and noydir meta tags.
- Simple removal of pages, taxonomies, or archives from indexing.
- Configuration for RSS footers and headers.
- Support for customizable breadcrumbs titles.
- Enhanced XML sitemaps.
- Tools for editing .htaccess and robots.txt files.
- Functionality to check Google Search Console, Yahoo Site Explorer, and Bing Webmaster Tools.
- Support for Schema markup.
How to Install Yoast SEO Plugin
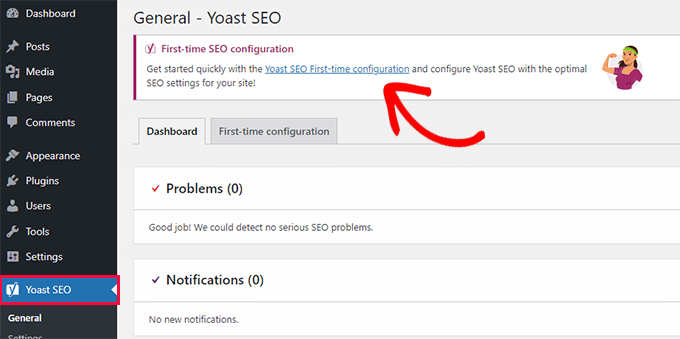
Installing the Yoast SEO plugin is a straightforward process. First, log in to your WordPress dashboard. Next, navigate to the “Plugins” section and click on “Add New.” In the search bar, type “Yoast SEO” and click “Install Now.” Once the installation is complete, activate the plugin.
Finally, configure the settings according to your preferences, including adding meta tags, optimizing content, and setting up XML sitemaps.
Yoast SEO is a popular choice among website owners and content creators due to its user-friendly interface and comprehensive features.
By utilizing the plugin’s tools for optimizing content and improving search engine visibility, users can enhance their website’s SEO performance and increase their chances of ranking higher in search results.
Additionally, the plugin’s intuitive setup process makes it accessible for users of varying technical expertise levels to improve their website’s SEO without extensive coding knowledge. How to Install and Setup Yoast SEO Plugin in WordPress