AdSense is a tool provided by Google that enables website owners to display advertisements on their pages. Once it’s configured, you can position ads in different areas of your site, like the sidebar, footer, or between blog posts.
Google will sift through its ad database to identify ads that are most relevant to your site’s content. For instance, if you begin a blog about shoes, it will feature ads related to socks and footwear on your site.
So, how do you earn money from this? It operates on a CPC (cost per click) model – each time someone clicks on an ad, you receive a payment. The amount you earn depends on elements such as keyword bids and ad quality scores. Adsense WordPress Tutorial Step by Step Guide
How to Set up Adsense on Your WordPress Site?
To begin, you must create a Google AdSense account. Click on “Get Started” and complete all the necessary fields. Following that, you’ll need to link your AdSense account to your WordPress website by following these instructions:
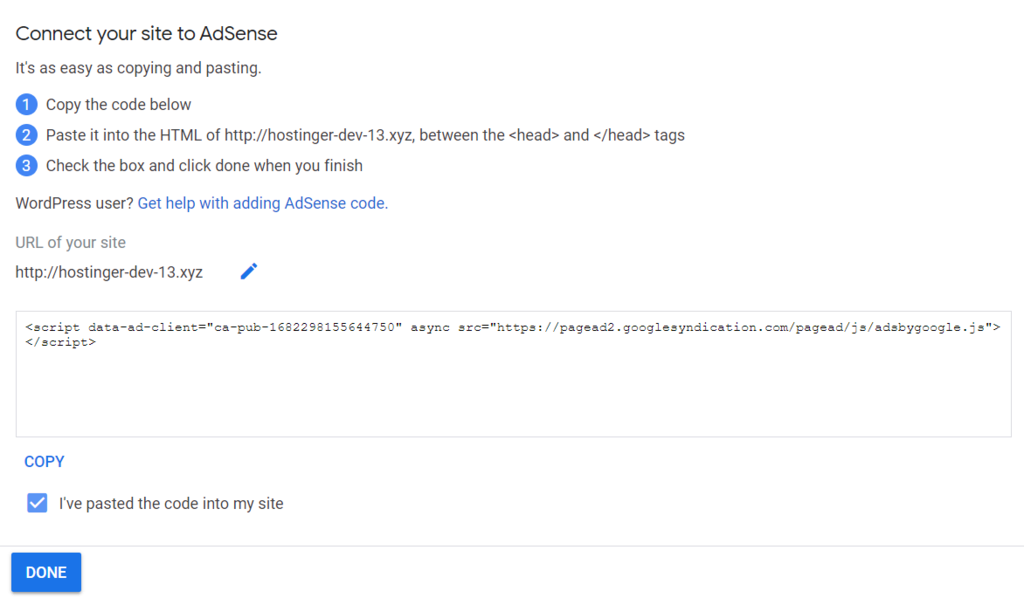
On the AdSense account page for your website, there’s a specific code snippet that needs to be inserted into your website’s header. Be careful not to click “Done” after copying the code. Also, make sure not to close the page.
- Enter your WordPress admin dashboard.
- Click Appearance → Theme Editor, then choose Theme Header in the Theme Files section.
- Insert the code just above the </head> tag
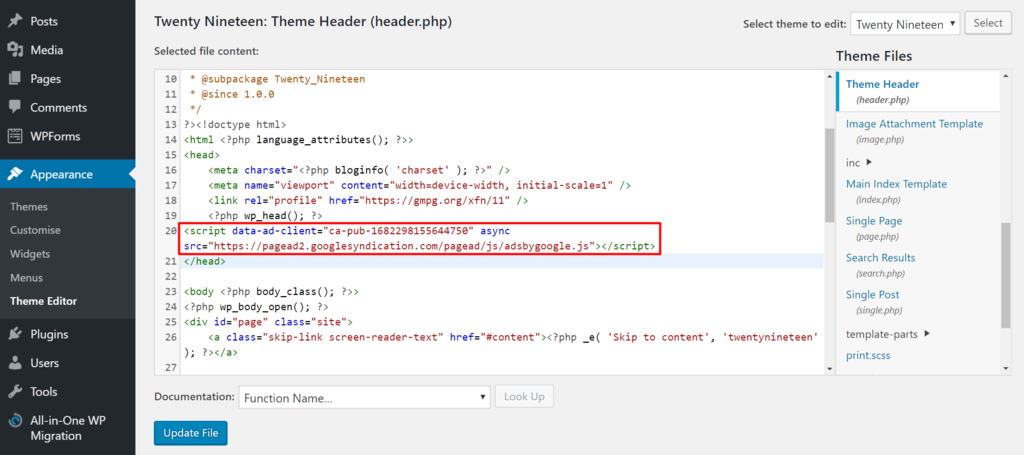
- Select Update File.
- Go back to the AdSense page, tick the I’ve pasted the code into my site checkbox, and press Done.
- A dialog box will pop up to tell you that your account approval is in progress. Click Got it.
Step 2: Add Ad Unit
Patience is key while the account activation procedure is underway. An email will be sent to you once your website has undergone a review. After your account is given the green light, you’re ready to begin designing your ad units:
Head to the Adsense dashboard and select My Ads located in the left sidebar.
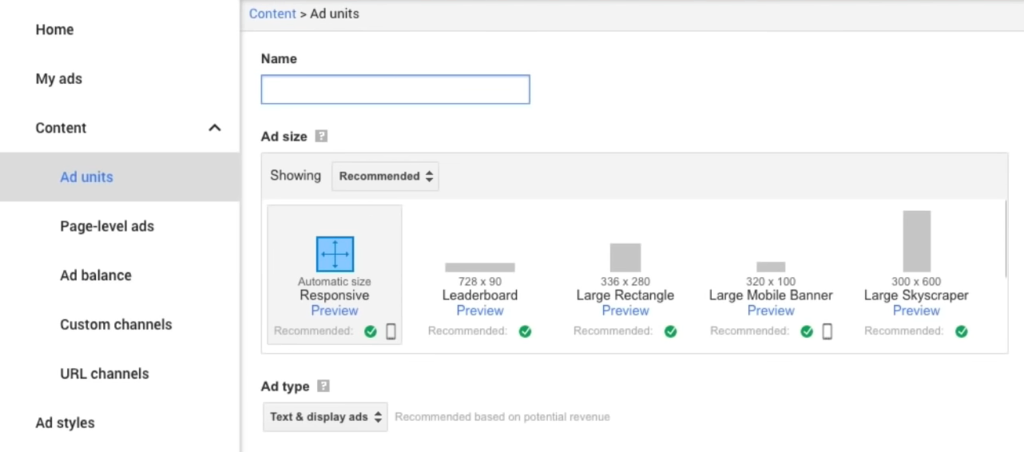
Move to Content → Ad units and press the New ad unit option.
Select the type of ad you wish to use. For instance, let’s opt for Text & Display ads.
Adjust the required settings to ensure it aligns with your website’s aesthetic:
-
- Name – enter a unique name to represent the ads. It will be easier to manage multiple ads in the future.
- Ad size – the shape and size of the ads will affect the view of your website. It’s recommended to select Responsive so the ads can adapt to all screen sizes.
- Ad type – you can use this option to switch to another ad type, such as in-feed or in-article ads.
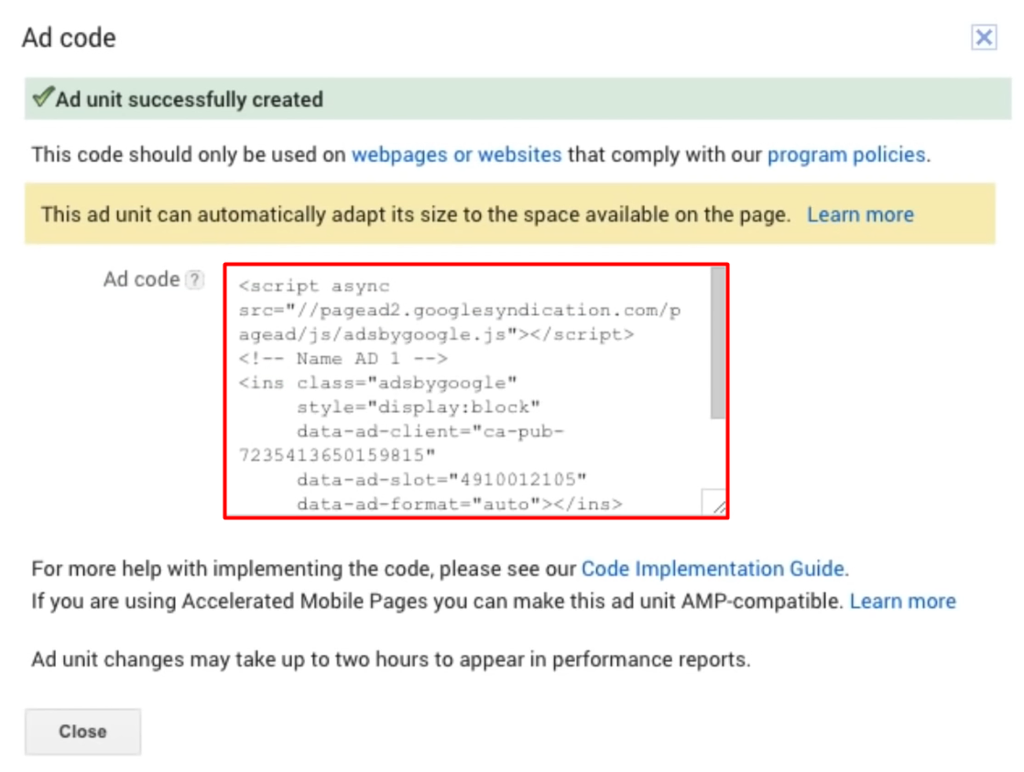
- Press Save and get code. A new window with your AdSense code will appear:
Google AdSense stands out as a straightforward method for generating income from your website. Throughout the years, we’ve assisted numerous bloggers in overcoming challenges related to making money from their blogs, and AdSense has consistently been a reliable option.
With Google AdSense, you have the ability to automatically sell ad space on your website to advertisers and receive payment. The great news is that there are almost no prerequisites to begin, making it available to bloggers at every level.
Whether you’re an experienced blogger looking to expand your sources of income or a newbie excited to begin earning online, Google AdSense presents an excellent chance.
In this guide, we’ll walk you through the process of integrating Google AdSense into WordPress, along with some best practices and advice we’ve gathered that can help boost your earnings. Adsense WordPress Tutorial Step by Step Guide