design a website with wordpress Designing a website has become an essential aspect for businesses and individuals looking to establish their online presence. Can you Build a WordPress Website in a Day?
With various platforms available, WordPress stands out as a popular choice due to its user-friendly interface and versatile features. In this blog post, we will guide you through the process of designing a website with WordPress.
From establishing your site to adding social media links, we have laid out five easy steps that will help you create an impressive and functional website. Whether you are new to web design or a seasoned professional, this post will provide valuable insights on how to effectively use WordPress for your website. WordPress Designer
Step 1: Establish Your Site
The first step in designing a website with WordPress is to establish your site. This means choosing the purpose and goals of your website, as well as identifying your target audience.
Ask yourself questions like: What do I want my website to achieve? Is it for personal use or for a business? What type of content will I be sharing?
By establishing these key aspects, you can better understand what features and elements your site will need to have in order to effectively meet its objectives. This step is crucial in setting the foundation for a successful website design process and ensuring that you create a site that caters to both your own needs and the needs of your audience.
Step 2: Design Your Homepage

In Step 2 of designing your website with WordPress, it’s time to focus on the homepage. Your homepage is often the first page visitors will see when they come to your site, so it’s important to make a good impression. Start by thinking about the overall layout and design of your homepage.
Consider what type of content you want to showcase, such as featured blog posts, products or services, or a visually appealing image or video. It’s also important to consider the navigation and usability of your homepage –
make sure it’s easy for visitors to find what they’re looking for and engage with your site. Finally, don’t forget about branding – incorporate elements like your logo and color scheme to make your homepage align with your overall brand aesthetic.
With these tips in mind, you can design a dynamic and attractive homepage that will draw visitors in and keep them exploring your website further.
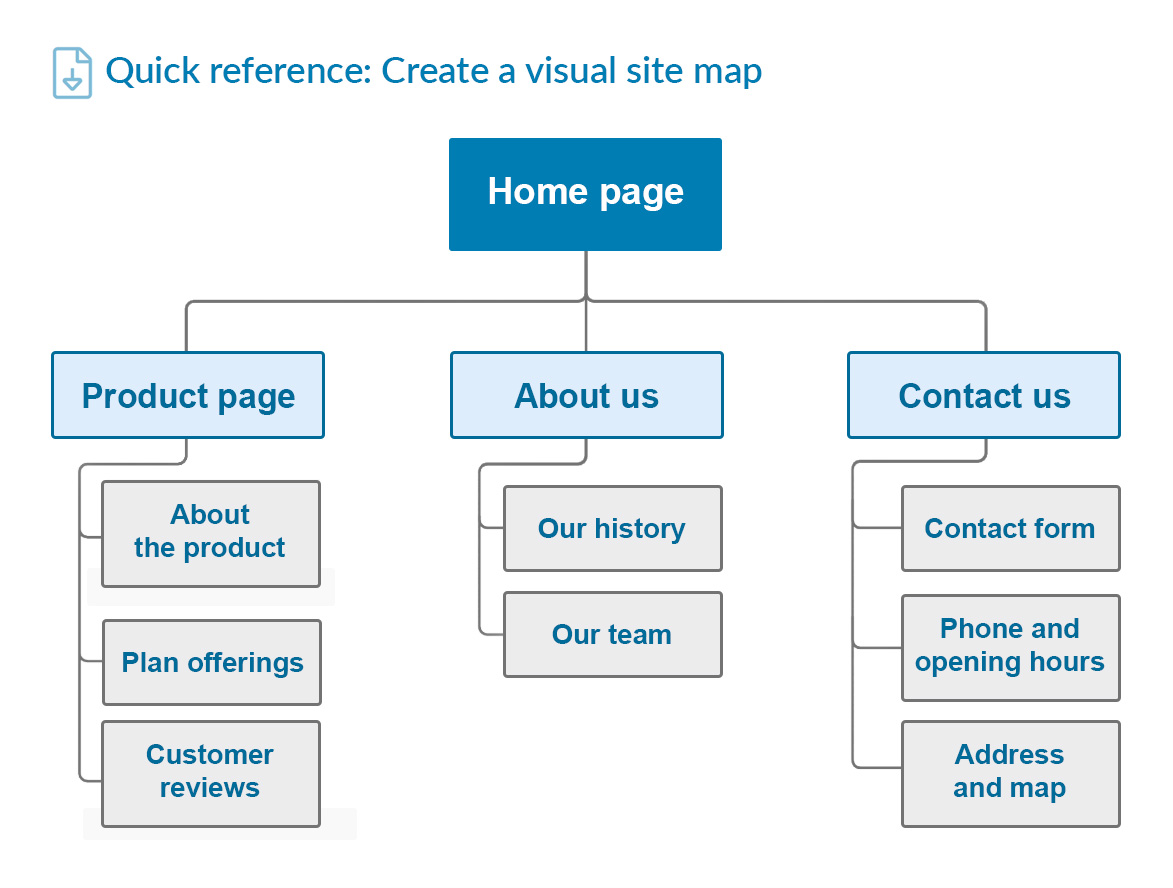
Step 3: Create More Pages
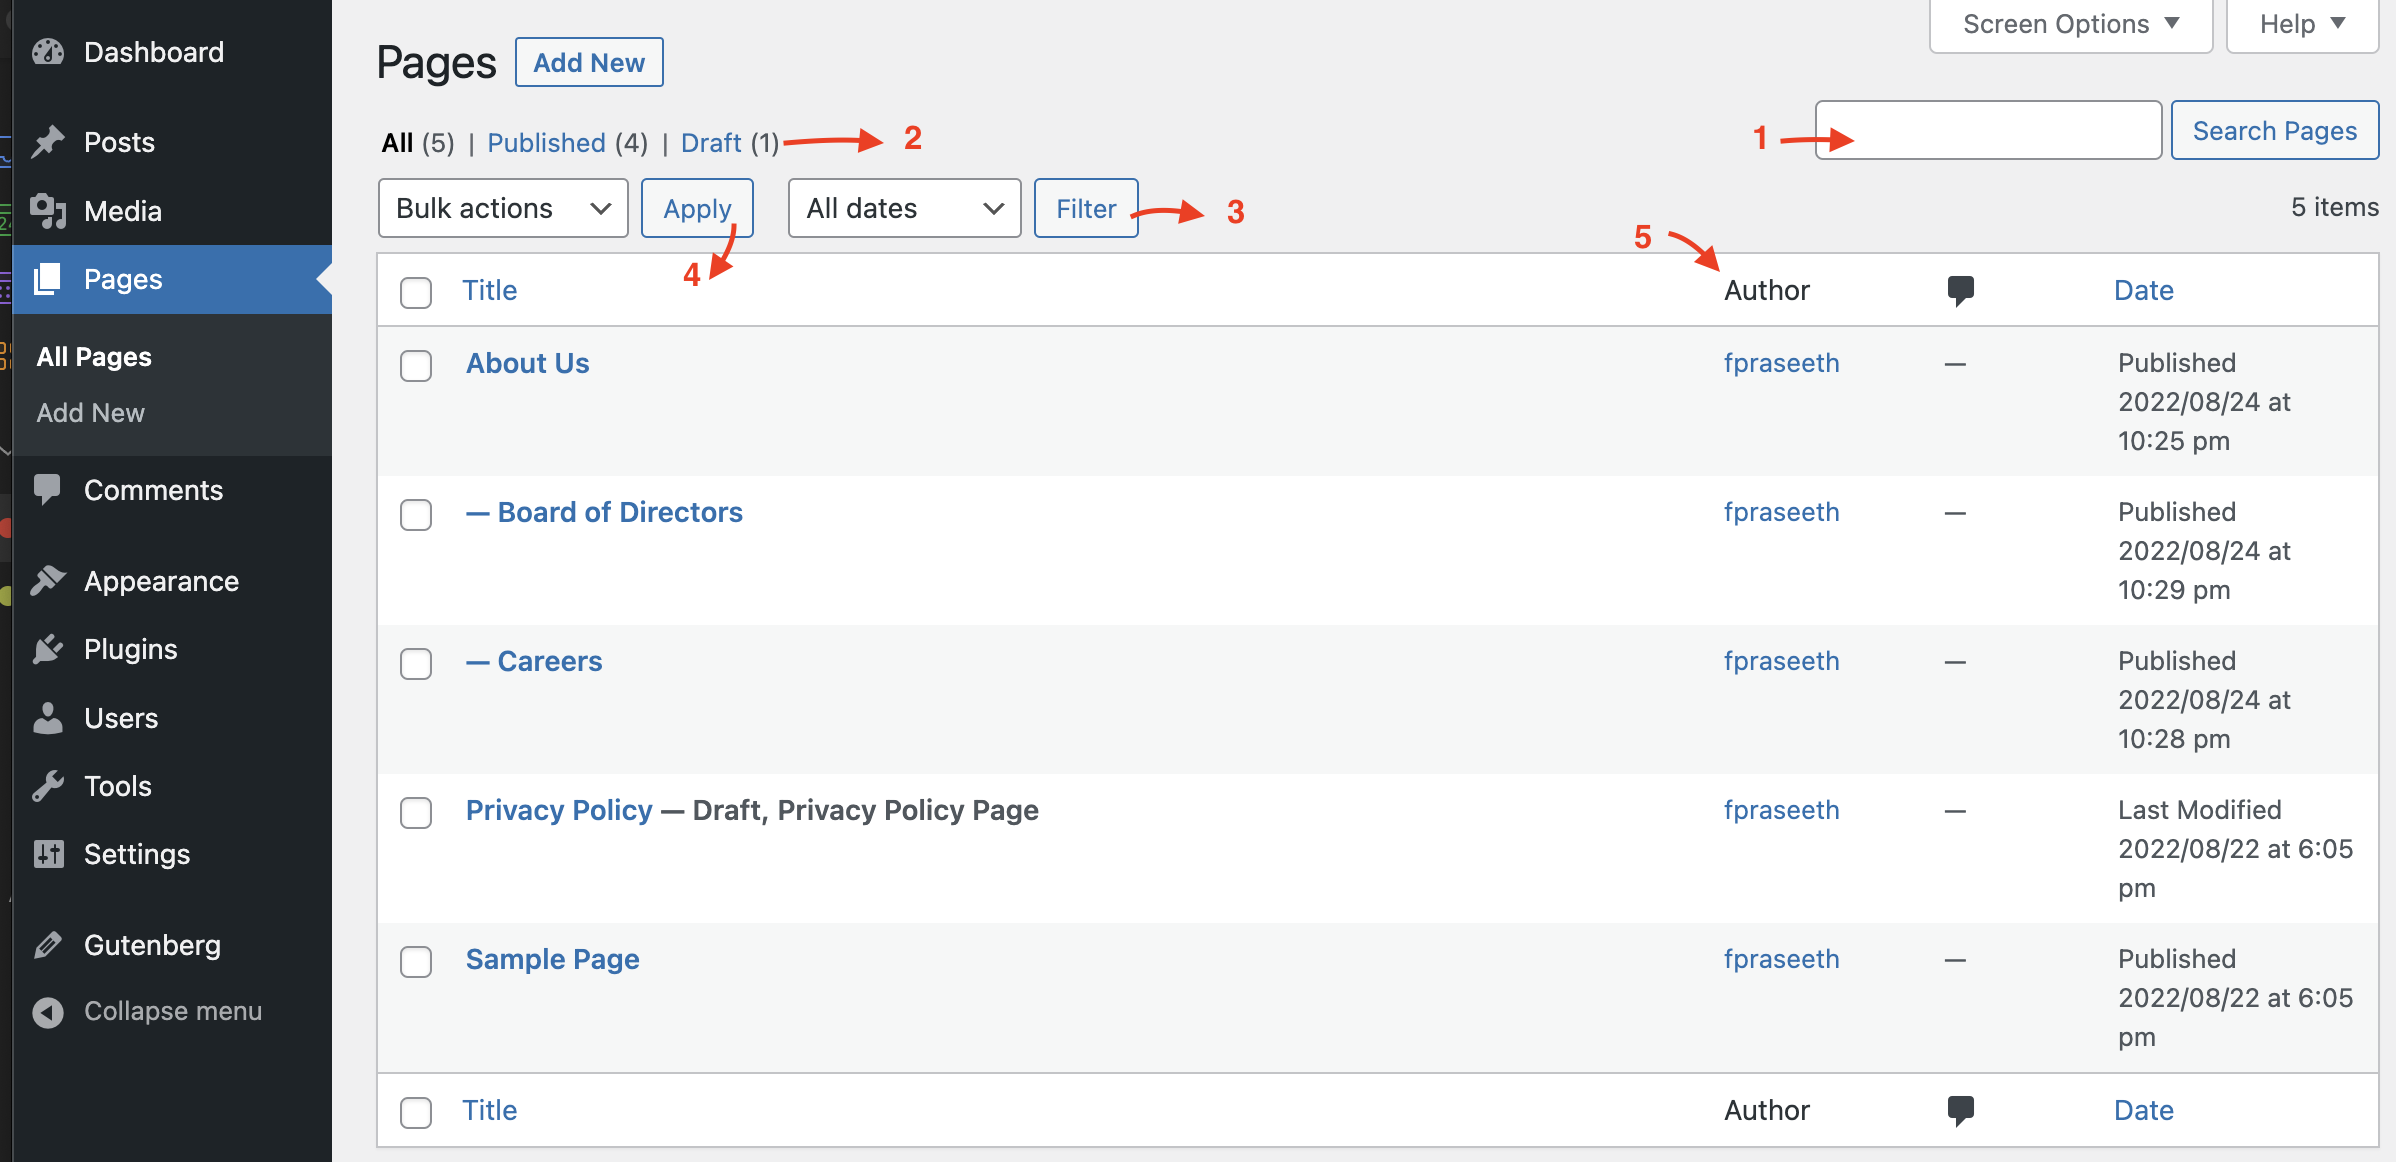
After creating the main homepage for your website, it’s time to expand and add more pages to enhance the overall user experience. With WordPress, this process is simple and intuitive.
First, decide what content you want to include on your website and create a menu structure that makes sense for your visitors. Then, using the Pages feature in WordPress, you can easily add new pages and customize them with different layouts, designs, and content.
This allows you to showcase your brand or business in a more detailed and organized manner. You can also add subpages under each main page to further organize your content. Remember to keep your pages consistent with the overall design of your website for a cohesive look and feel.
Step 4: Set Up Your Menu
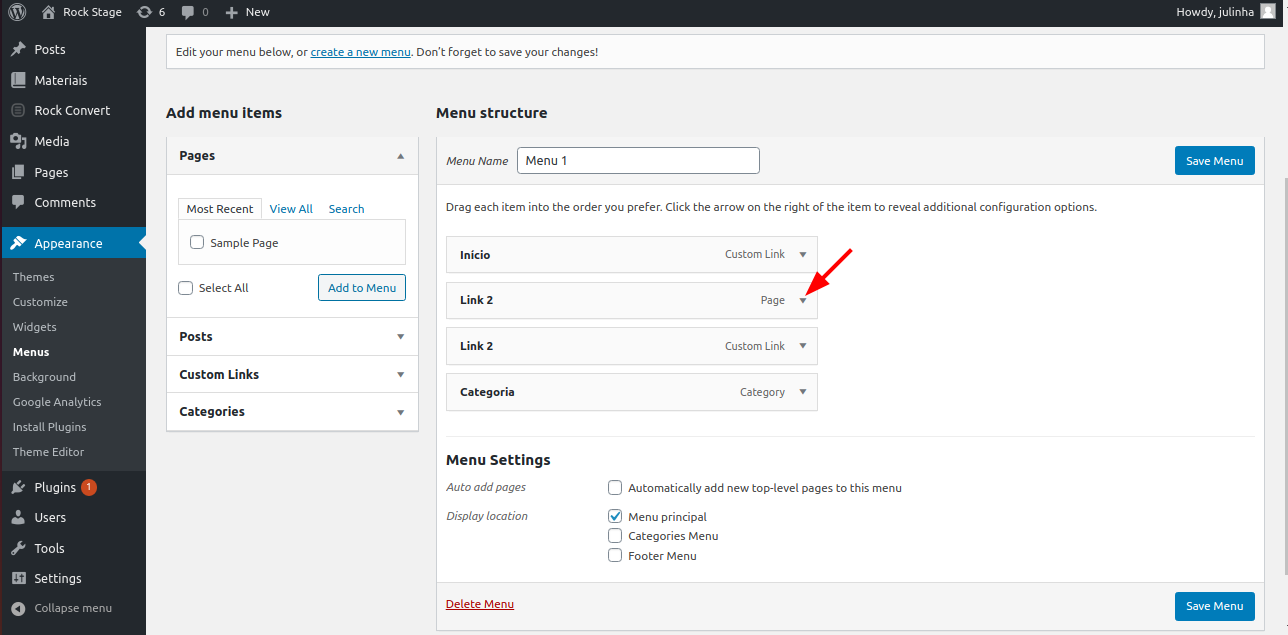
Once you have selected a theme, it’s time to set up your menu. This is an important step in creating a user-friendly website as it helps visitors navigate through your site easily. In WordPress, you can create menus by going to
Appearance > Menus in your dashboard.
Here, you can add pages, posts, custom links, and categories to your menu. You can also rearrange them by simply dragging and dropping items.
Make sure to include important pages such as About Us and Contact Us in your menu for easy access. You can also create sub-menus for better organization.
Remember to save your changes and preview your menu before publishing it on your website. A well-structured menu will make a positive impact on the overall design of your website and enhance the user experience.
Step 5: Add Your Social Media

In today’s digital landscape, it’s important to have a strong social media presence for any business or website. That’s why in Step 5 of designing a website with WordPress, we’ll be focusing on adding your social media accounts to your website. How to Add Social Share Buttons in WordPress
This will not only help increase your brand awareness and reach but also make it easier for visitors to connect with you and share your content. With WordPress, there are several ways to integrate social media into your website such as using plugins,
widgets, or even embedding social media feeds directly onto your pages. By incorporating social media into your website design, you’ll be able to engage with your audience in a more dynamic and interactive way, ultimately driving more traffic and potential customers to your site.
Additionally, WordPress boasts a robust community of developers and users who contribute to forums, tutorials, and resources, providing a wealth of support for anyone looking to build or enhance their website. This community-driven approach fosters an environment where users can easily find solutions to common problems, share tips and tricks, and stay updated on the latest trends and best practices in web design. Whether you are a hobbyist creating a personal blog or a business owner establishing an online presence, the collaborative nature of WordPress ensures that help is always just a click away, making the website design process not only simpler but also more enriching. Design a Website with WordPress Tutorial How to Build an Ecommerce Store