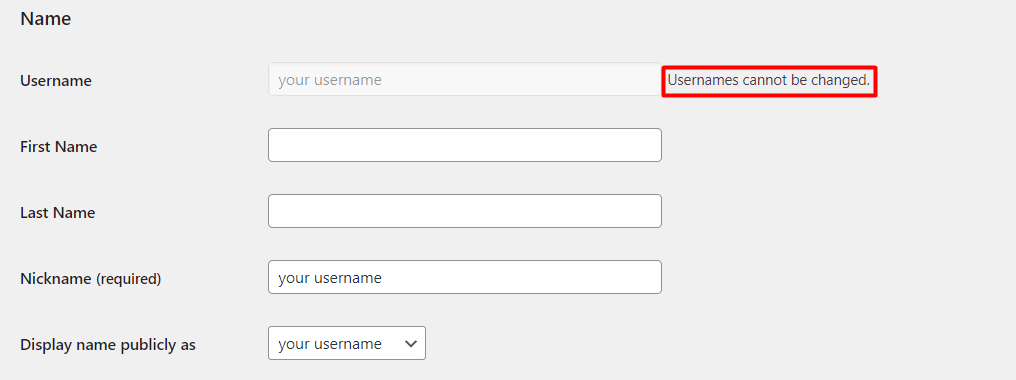
To change your WordPress username, log in to your admin dashboard. Go to Users, then click on your profile. Next, enter your new username and confirm by entering your current password. How to Change WordPress Username
Save the changes, and your username will be updated. This process is quick and easy, allowing you to personalize your WordPress experience effortlessly.
Changing your WordPress username can be a simple yet impactful way to make your website more unique and personal. By following these steps to update your username, you can ensure that your online presence reflects your brand or identity accurately.
Additionally, having a username that resonates with you can enhance your user experience and make managing your WordPress account more enjoyable.
1. Use Your WordPress Database
The initial approach to alter your username involves modifying the website’s database using phpMyAdmin. This technique demands a certain level of technical skill and might prove difficult for newcomers.
Here’s a quick overview of how to change your WordPress username using the database:
- Access phpMyAdmin through your hosting panel.
- Select the wp_users table.
- Find the user under the user_login column.
- Click on the Edit button next to the username you want to change.
- Find the user_login row and enter the new username in the Value field.
- Click on Go to save the changes.
2: Create a New User and Delete the Old One (No Plugin)
The simplest method to switch your WordPress username involves setting up a new account using the username you wish to use, along with the administrator role.
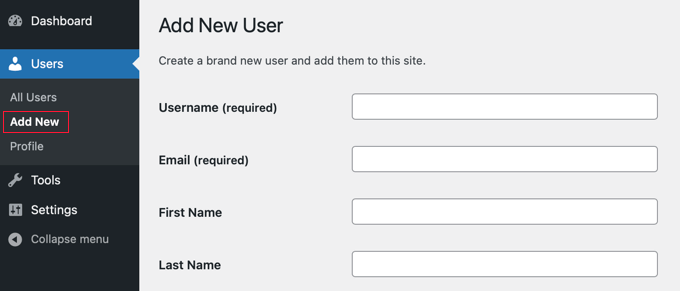
However, there’s a slight requirement: you must use a different email address than the one associated with your existing account.
Once the new account is established, you’ll need to log out of your WordPress account and then log back in using the newly created account.
Following that, navigate to the Users » All Users section in your WordPress admin dashboard and select the ‘Delete’ option next to your previous username to remove it.
Upon deleting the old username, WordPress will prompt you to decide what to do with any content created by that user.
Subsequently, press the ‘Confirm Deletion’ button to remove the old user account.
Well done, you’ve successfully updated your WordPress username. Should you wish to retain the same email address, you’re now free to update the email address of the new account.
Ensure to choose the ‘Attribute all content to’ option and then select the newly created account.
Conclusion
Understanding the process of modifying WordPress usernames can be beneficial for various situations.
At times, a user may find it necessary to alter their username to more accurately represent their brand and content. Additionally, some users might need to update their username before transferring ownership of the website.
Moreover, relying on a standard username or a common password can expose a website to considerable threats, as automated hacking attempts are likely to succeed. Therefore, it’s crucial to use a distinct and secure username to protect your website.
Although WordPress lacks a built-in option for changing usernames, it is still feasible to modify your WordPress username securely through these three steps: How to Change WordPress Username: 3 Effective Methods